Create a Set Value Tab
Scenario : A customer is hosting an event/function at your establishment and wants to open a Tab. The customer will then be invoiced separately for the event/function.
There are two ways to set up a tab for an event/function; A Set Value Tab or A Credit Tab.
A Set Value Tab has the value of the tab set, with the option to be topped up once that value has been reached, which will then be invoiced separately.
How to create a Set Value Tab
1 : To create a Set Value Tab click on the OFFERS button on the top bar.

|
2 : Click the NEW button on the right hand side.

|
3 : Offer Type, select the offer type from the drop-down. Select Tab/Gift Voucher > Click SELECT THIS TYPE button.

|
4 : Input offer details - Name | Connect To | Auto-Renew | Auto-Assign.
Name : A unique name for your offer Connect To : POS System Site - if you have multiple venues you can create different offers for each site. Auto-Renew : This is if you would like this offer to renew once it has been redeemed Auto-Assign : Assign this offer to new customers
Once all the information is complete, click on NEXT : Create Rule
PLEASE NOTE : Tab Offers generally do not Auto-Renew or Auto-Assign as they are for a set event and a set value.

|
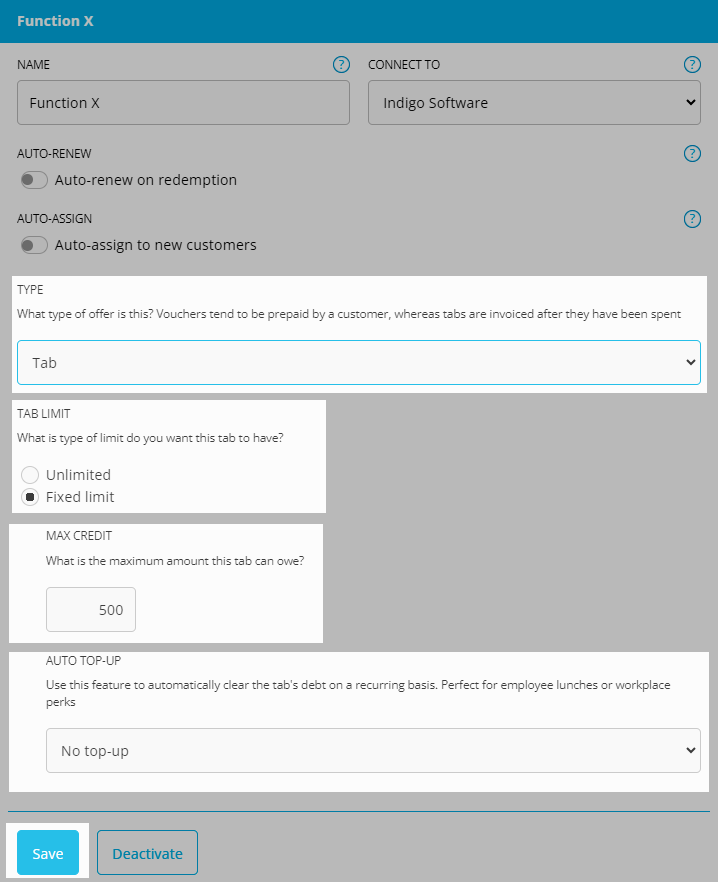
5 : Next add in the TYPE of offer, MAX CREDIT and AUTO TOP-UP.
TYPE : from the drop-down box, select TAB. TAB LIMIT : select which type of limit, unlimited or fixed amount. MAX CREDIT : type in the maximum amount on this tab. AUTO TOP-UP : this feature can be used to top-up from the following options; no top-up, top-up everyday, top-up every week, top-up every month, top-up every year.
NOTE : Auto Top-Up for events/functions is not required, please select NO TOP-UP
Once value has been added select SAVE.
|
ASSIGNING CARDS TO CUSTOMERS
1 : Click on the PEOPLE button on the top bar.

|
2 : Search for customers in the search bar.
NOTE : Your customer list will be displayed in alphabetical order. This will display the Customer Name | Email | Membership # | Last Modified | Add Card

|
3 : Select the ADD CARD button.

|
4 : Select the type of card from the drop down box > Select CREATE CARD.

|
5 : The new card will then be added to the customer's list of cards.
From here you can top-up the card, view the transaction history, check the status, edit the code and select to create invoices.
|
Find out how to REDEEM TAB in POS. |