Spend $X, Get $Y Credit - Ongoing Offer
Spend $X, Get $Y Credit - Ongoing Offer can be assigned to customers to receive a store credit once they spend a certain amount.
Example : A store promotes a Spend $X, Get $Y Credit for all new customers.
Customers need to Spend $100 to get a $5 store credit. This offer is Auto-Assigned to all new customers and is Auto-Renewed. The credit would accumulate over time.
How to create a Spend $X, Get $Y Credit Offer - Ongoing Offer
1 : To add a Spend $X, Get $Y Credit Offer click on the OFFERS button on the top bar. 
|
2 : Click the NEW button on the right hand side.

|
3 : Offer Type, select the offer type from the drop-down. Select Spend $X, Get $Y Credit Offer > Click SELECT THIS TYPE button.

|
4 : Input offer details - Name | Connect To | Auto-Renew | Auto-Assign
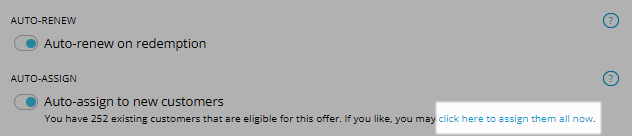
Name : A unique name for your offer Connect To : POS System Site - if you have multiple venues you can create different offers for each site. Auto-Renew : This is if you would like this offer to renew once it has been redeemed Auto-Assign : Assign this offer to new customers
Once all the information is complete, click on NEXT : Create Rule
PLEASE NOTE : This example shows an ongoing offer, the Auto-Renew and Auto-Assign have been selected.

|
5 : Next add in the number value for SPEND and CREDIT. Once these values have been added select NEXT - ADD PRODUCTS.

|
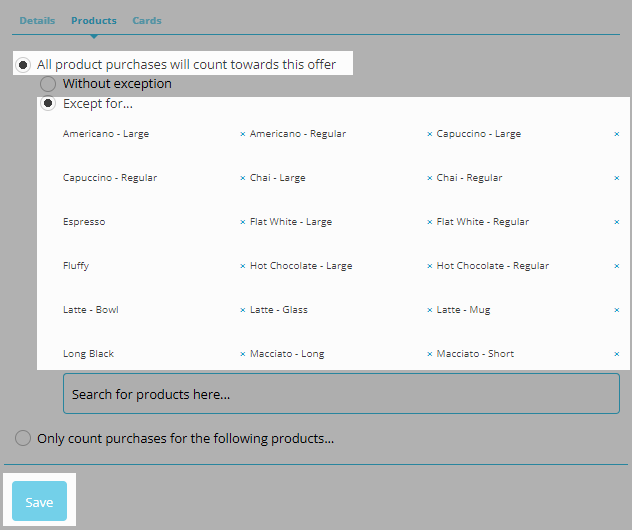
6 : In the PRODUCTS section, add the products needed for this offer.
ALL PRODUCTS : Select the button for ‘All product purchases will count towards this offer’ WITHOUT EXCEPTION - this will allocate all products available EXCEPT FOR - this will allocate all products ‘except for’ the products you search for in this section.
SELECTED PRODUCTS :
Select the button for ‘Only count purchases for the following product’. Search for the products needed for this offer in the search bar. Each product will be added to the offer and listed in this section.
Once all products are added - select SAVE.
|
ASSIGNING CARDS TO CUSTOMERS
Once the card has been created, you can allocate this to customers.
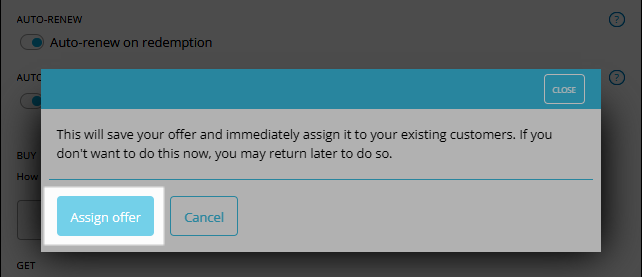
If you want to assign the offer to all customers, under AUTO-ASSIGN TO NEW CUSTOMERS, there is the option to CLICK HERE TO ASSIGN THEM ALL NOW.
|
Select ASSIGN OFFER.
|
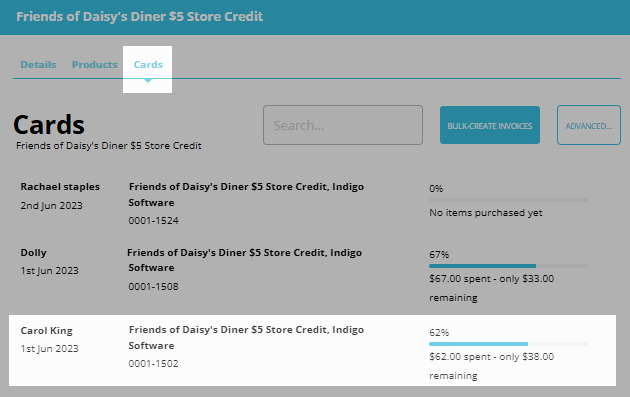
CARDS
Once the offer has been allocated to a customer, you will be able to view the CARDS usage.
Select the CARDS tab (next to Details|Products) to see a breakdown of the usage of this offer.
Each transaction is listed show the following; PERSON| DATE | OFFER | CODE | STATUS
|
To see more information on a particular transaction, select the transaction to bring up the details.
This will show the breakdown of how this offer has been used, based on;
PERSON| OFFER | CODE | STATUS | ACTIVATIONS | POINTS
In the ACTIVATIONS section, each transaction is listed showing the DATE | TIME | PRODUCT/S | POINT ALLOCATION

|
Find out how to REDEEM A SPEND $X, GET $Y CREDIT in POS. |